

The Easter holidays are well and truly upon us and with such mixed weather, you may be quickly running out of activities to keep your little ones entertained…
But don’t worry!
Annabel and I have been busy testing out lots of fun crafts, yummy baking, easy painting projects, and even rearing butterflies so that you’ve got a host of activities tucked up your sleeve.
My favourites have to be the Kindness Tree as it makes me smile every time I walk past it, and the easy yet incredibly effective toilet roll printing, whilst Annabel loves the cheesey chick crackers and egg characters.
Let me know which of these activities you try and which are your favourite.
Love Lucy and Annabel x
PS If you’d like to receive information about Lucy McKenzie Photography, including future crafting blog posts, then please join my mailing list.
Food
Cheesey chick crackers
These are a fun and easy snack, or can form part of a picnic tea - Annabel has been requesting them regularly since they first made an appearance! Use a cookie cutter to cut out rounds of cheese, and carrot to form the feet, tufts of hair and beak. I finished these off with little black eyes using coloured writing icing. If you don’t have carrot, slices of cherry tomatoes or grape work just as well. Cucumber skin makes great hair too.


Giant Carrots
Sprinkle grated cheese over a tortilla (Red Leicester is ideal as it has a wonderful orange colour, though it was sadly rejected by Annabel, who is a parmesan kinda girl!) and place under the grill for a few minutes until the cheese has melted.
Then add your choice of greenery in a ring around the outside of the tortilla (where the crust of a pizza would be) - this could be slices of cucumber, small florets of raw brocolli or lettuce.
Add grated carrot on top of the cheese, then slice into 6 or 8 pieces and serve to your own little bunnies!
Top tip:
If you don’t grill your tortilla, you’ll find that the grated cheese slides straight off as soon as the ‘carrots’ are picked up. However, you could instead switch to sliced cheese or smother the tortilla with a thin layer of cream cheese before adding your toppings to act as a glue.
Bunny fairy bread

When I taught in Australia, I came across the concept of Fairy Bread - which is simply bread with hundreds and thousands scattered on top - a non-bake treat that you can rustle up easily.
To make this Easter variation, cut the crusts off a piece of white bread, spread with cream cheese and sprinkle hundreds and thousands on top. Use a biscuit cutter to cut a bunny out of the centre of a second piece and then sandwich the two together.
Don’t discard the bunny cut outs - mix a touch of red food colouring into cream cheese and spread on top to create a little pink bunny. I recommend you warn your child that this is not pink icing as eating slightly tangy cream cheese when your expecting sugary icing messes with your head a little!

Annabel’s class enjoyed making these at school
Chocolate nests
Chocolate nests were pretty much synonymous with Easter when I was growing up!
Melt 250g milk chocolate with 2tbsp golden syrup and 75g butter in a bowl over a pan of simmering water (or in the microwave if you prefer).
Remove from the heat and add 100g of crushed Shredded Wheat, Corn Flakes or Rice Crispies. Stir until the chocolate mixture is evenly distributed.
Share the mixture into 12 muffin cases and make an indentation in the centre to form the middle of the nest.
Add some mini eggs to the centre of each nest.
Then allow to set in the fridge for about 2 hours (whilst you all enjoy licking the bowl!)
Easy carrot cupcakes

This are so simple to make, and children and adults alike will enjoy the results.
Mix the following dry ingredients in a bowl:
160g self raining flour (I used gluten-free)
100g granulated suger
100g soft brown sugar
1 teaspoon baking powder
1/4 tsp salt
3/4 tsp cinnamon
1/4 tsp ginger
1/8 tsp nutmeg
2. Mix the following wet ingredients in a separate bowl:
1/2 cup vegetable oil (I used sunflower oil as that was what was in my cupboard)
1 tsp vanilla extract
2 large eggs
3. Mix the dry ingredients into the wet ingredients using a spatula. Then add:
150g peeled and finely grated carrots
50g coarsely chopped pecans (optional)
4. Put 12 muffin cases into a muffin tin and share out the mixture evenly - they should be about 3/4 full.
5. Bake at 180 degrees for 20-25 minutes (until a cocktail stick stuck into the middle comes out clean).
6. Whilst they are baking, beat 230g Full fat cream cheese (Philadelphia or equivalent) and 1 tsp vanilla extract together, then gradually add 3 cups of icing sugar a bit at a time until it is all mixed together smoothly.
7. Once the muffins are cooled, pipe on the icing and sprinkle with chopped pecans.
Easter Hunt
Easter just wouldn’t be Easter without an egg hunt around the garden!
Here are some different ideas to jazz up your Easter morning:
Eggs and chicks - little children love finding things, but generally don’t have much self restraint (well, neither do I when it comes to chocolate!), so instead of hiding chocolate eggs, why not try hiding plastic eggs or tiny chicks for them to collect in a basket. Once they have found a certain number, they can claim their chocolate treat!
Top tip: If your child is young, you don’t need to have lots of items to hide - instead encourage them to bring you their findings every so often and, when their backs are turned, hide those items all over again! You can keep going for as long as they are having fun!

Puzzle pieces - Using hollow plastic eggs, place a puzzle piece inside each one. Once your children have collected all the eggs, you can gather around the table to assemble the puzzle together - with a treat for a completed puzzle of course!
Ingredients - Hide different ingredients (in a little container or plastic bag) inside hollow eggs or pretty Tupperware. Once your little ones have collected all the ingredients, you can all bake one of your favourite easter recipes (perhaps the carrot cake cupcakes featured below?!).
Decorate an egg - Include bits and pieces like googly eyes, sparkly stickers, feathers and pieces of felt inside an egg so that your children can create their own character using the egg as a base after the hunt (Annabel had fun creating some characters… there are some ideas further on).
Burn off some energy - Get into the competitive spirit by putting a simple physical challenge such as ‘do 10 star jumps’ or ‘run across the garden and back’ inside each egg. You can try this two ways:
The person who finds the egg calls out the challenge and does the activity themselves (this version helps to slow down older siblings and reduce the chance of them finding everything first!)
The person who finds the egg calls out the challenge, but keeps searching whilst the rest of the group has to do the challenge before they can go back to their egg search.
Making memories - Write fun activities like ‘a movie night’ or ‘trip to the seaside’ on pieces of paper (if you’ve got a bit of time, you could make these look like gift vouchers) and pop them into the eggs so that your children can claim them at a later date.
Crafting and cards
Bunny mask - It’s amazing what you can create with the humble paper plate!

Cut the centre out of two paper plates.
Cover one plate ring in glue - PVA works best - and stick on cotton wool balls. This is a fun, messy job for little ones! (Don’t forget to roll up their sleeves or pop on an overall)
Cut out ear shapes from the white card and smaller versions from pink. Glue a pink and a white together and then glue to the back of the first paper plate.
Make holes in the side of the plate (either using scissors or a hole punch).
On one side, thread a couple of pipe cleaners from the front to the back of the plate and then through another hole to come from the back to the front again, and bend into shape. You can add tape to hold these at the back. Repeat on the other side.
Glue or tape a lolly stick to the bottom to hold the mask.
Finally, glue the second plate to the back of the first to neaten everything up and help to hold it in place.
Top Tips:
When making holes in card, place a piece of blue tack, plasticine or even a rubber behind the card. Then push through with the end of a pair of scissors or a biro.
You can add a little touch of face paint for a little nose on your own little bunny.
Chicky Fork Painting (Preschool and KS1)

masandpas.com
This is a great alternative to using a paint brush, but still works on developing hand-eye coordination and concentration.
Using a pencil, draw a large circle on a piece of paper to act as a guide.
Dip the back of a fork into a plate of yellow paint and press onto the paper, turning it gradually as you go.
Keep adding layers of fork prints to create a fluffy looking chick.
Add a felt or card triangle for a beak, google eyes and draw some little legs.
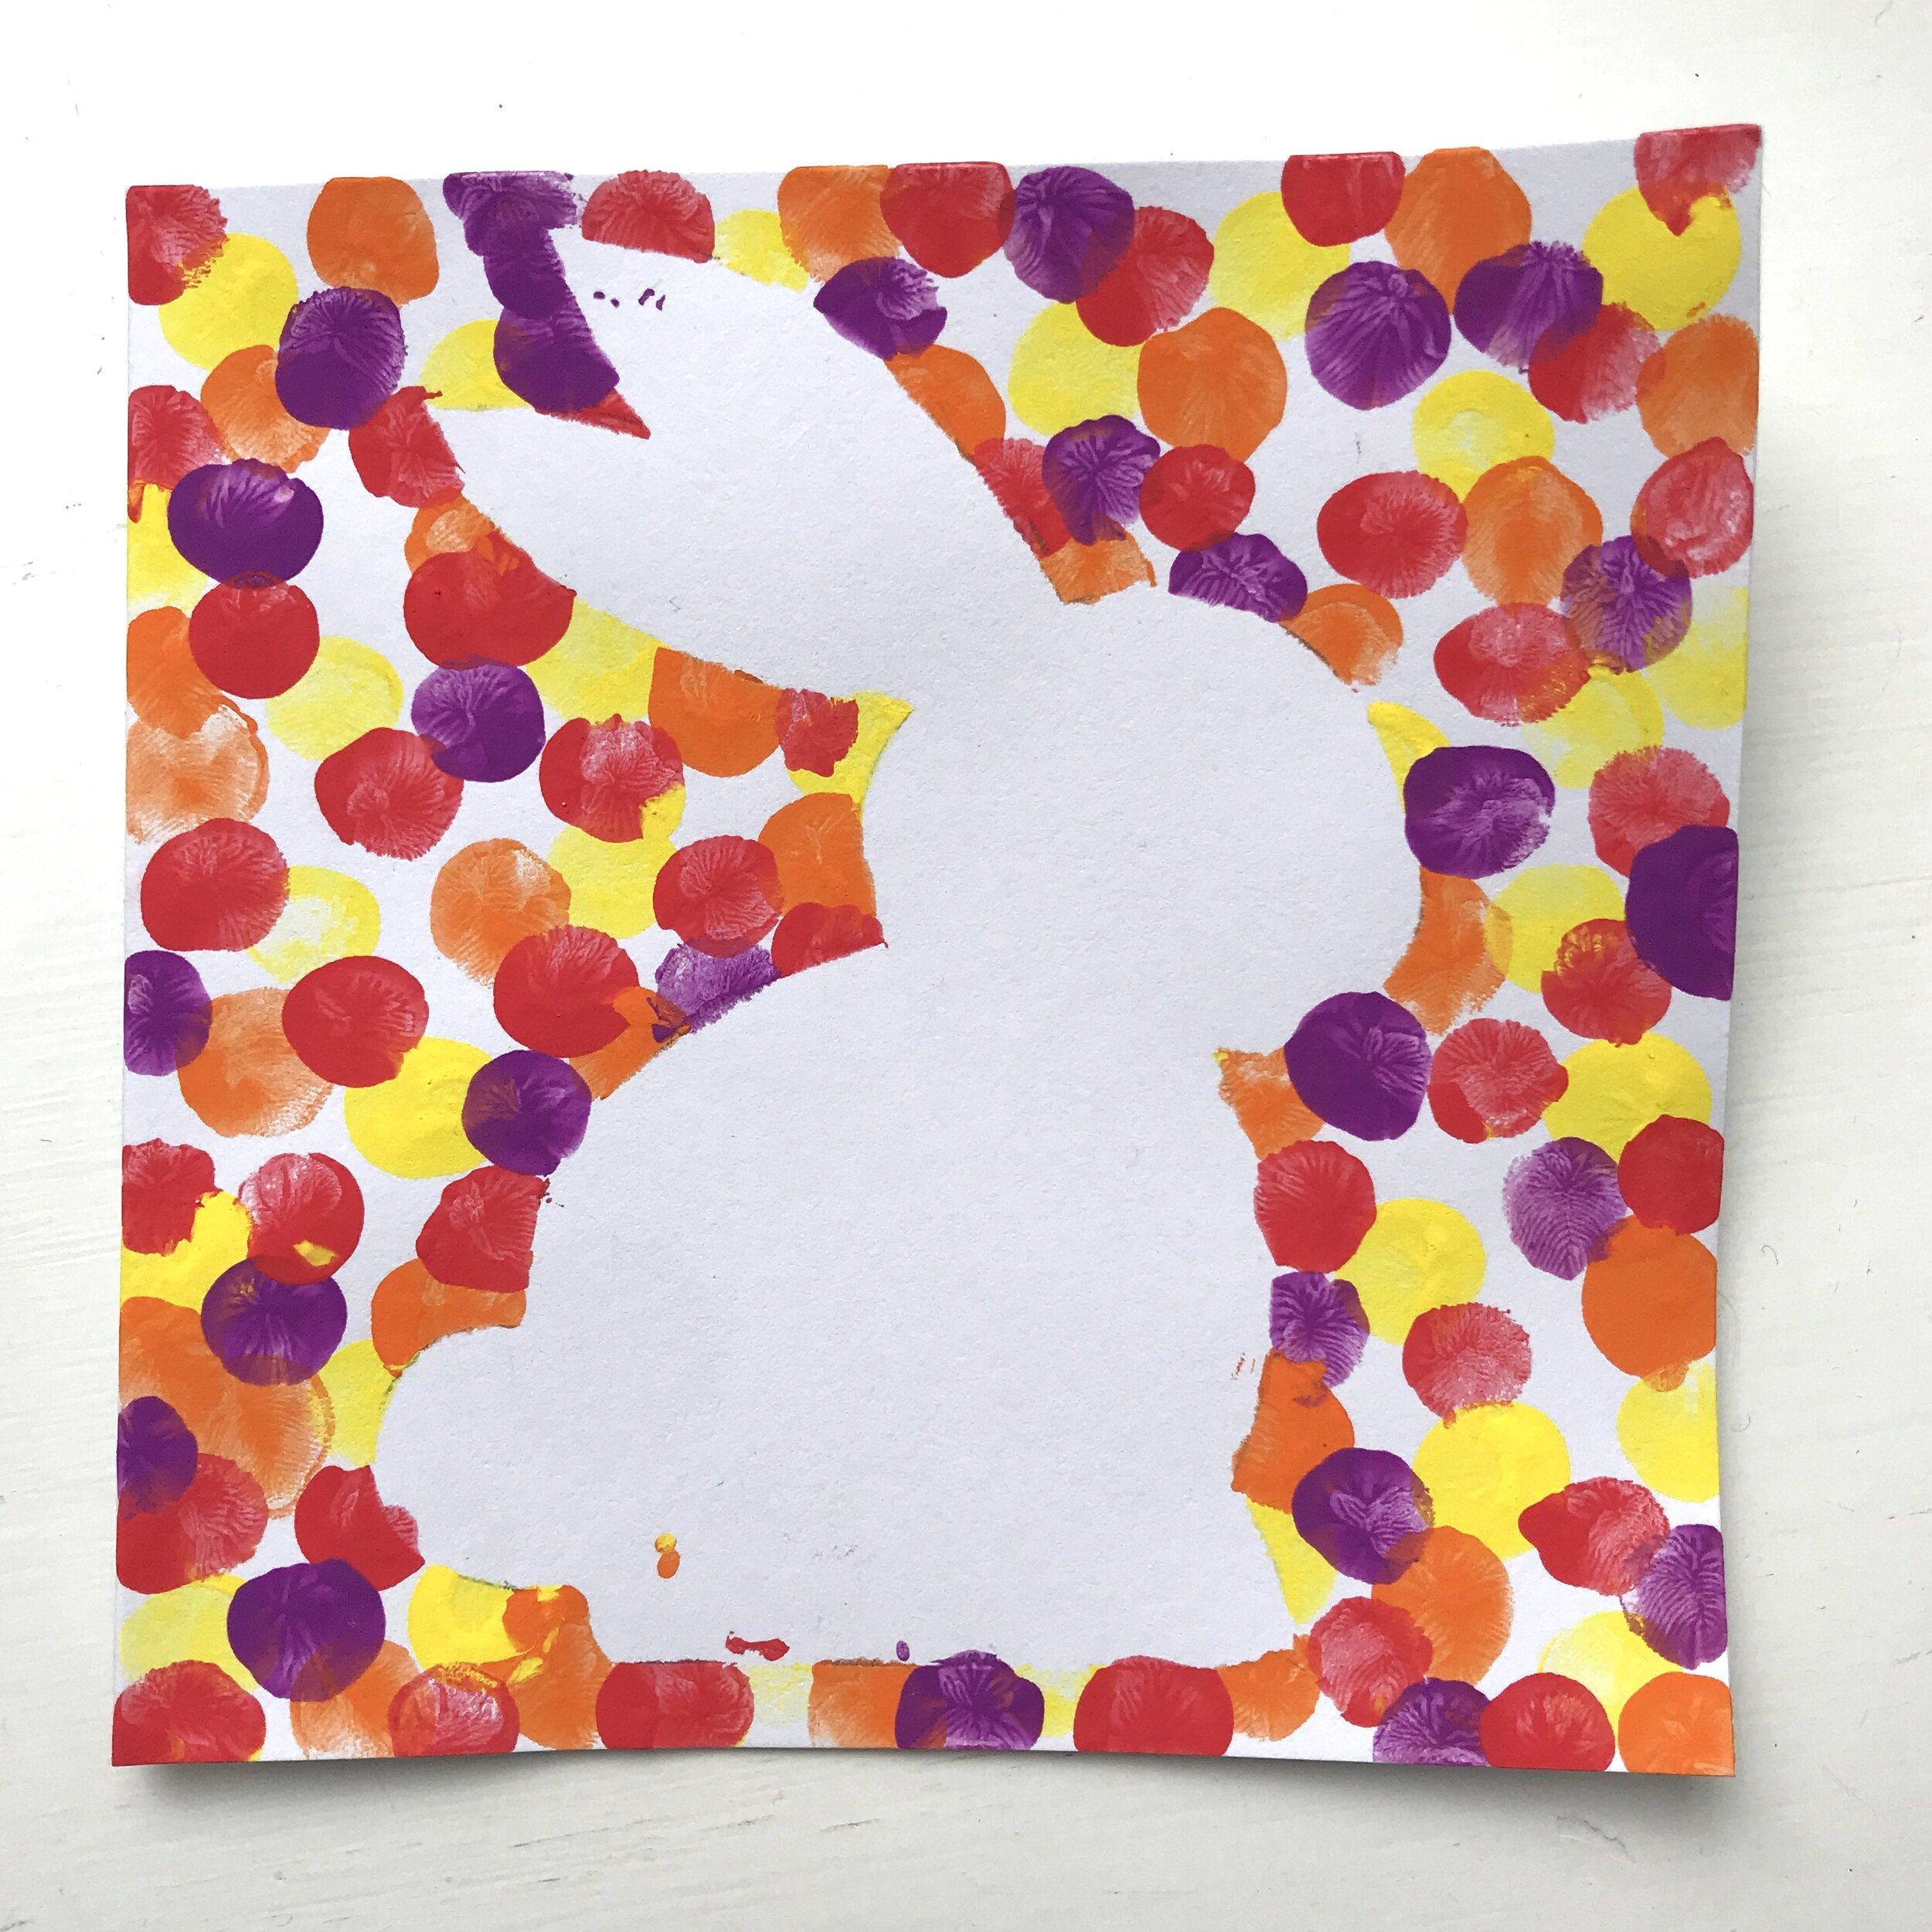
Toilet roll bunnies (Preschool upwards)
These bunny faces are a simple alternative to traditional potato printing and the results are really effective. It is suitable for little toddler hands, but my 6 year old had fun printing this way too.
Yo can create a collection of Easter cards to send to the whole family very quickly or cut different colours of A4 paper into egg shapes and then stamp them with bunnies to create bright Easter decorations for your wall.

Crease a toilet roll lengthways to create the top and bottom of an ear shape.
Repeat with a second toilet roll.
Wrap tape around the two ears and a normal toilet roll to create the complete head shape and hold it all in place. (I found this a bit fiddly, so you may need a second pair of hands!)
Pour some paint into a small shallow dish and show your child how to dip the end of the toilet roll into the dish. Alternatively, use an ink pad if you have one.
Place the end of the toilet roll onto the page to create a pattern of bunny faces.
Have fun experimenting with different coloured paper and paint, and once they are dry, add little faces with pen.
Woven Eggs (Preschool and KS1)
These are a development of the wound shapes above as sewing requires a little more dexterity. They are great opportunity for little ones to work on their fine motor skills.

Top tips:
If you don’t have a large plastic needle, simply wrap the end of the wool with tape to stiffen it and so that it doesn’t fray as it’s pulled through.
We painted one of the eggs before threading, which is a great way of extending this activity over a couple of sessions. You could also add sequins or stickers.
If you would like to create a more regular woven effect with a young child (like the second egg in my photo), I recommend you make the holes for the horizontal lines first and let your child thread them before making the holes for the vertical threading, otherwise there are too many holes for your little one to keep track of. You can encourage them to weave the wool over and under existing threads.
Plastic Eggs (KS1 upwards)
Make and Takes has collated loads of ideas for ways to decorate plastic eggs. (Their website is well worth a look as they have a section on crafting for grown ups too!). You can buy eggs like this at The Works, Hobbycraft or there is a huge range on Amazon. Your children could either decorate the eggs ready for their Easter egg hunt or, if it is the Easter bunny who brings the eggs, you could decorate the ones that the children find once the hunt has taken place (perhaps you could include some of the decorative materials they will need inside one of the eggs for them to find?)
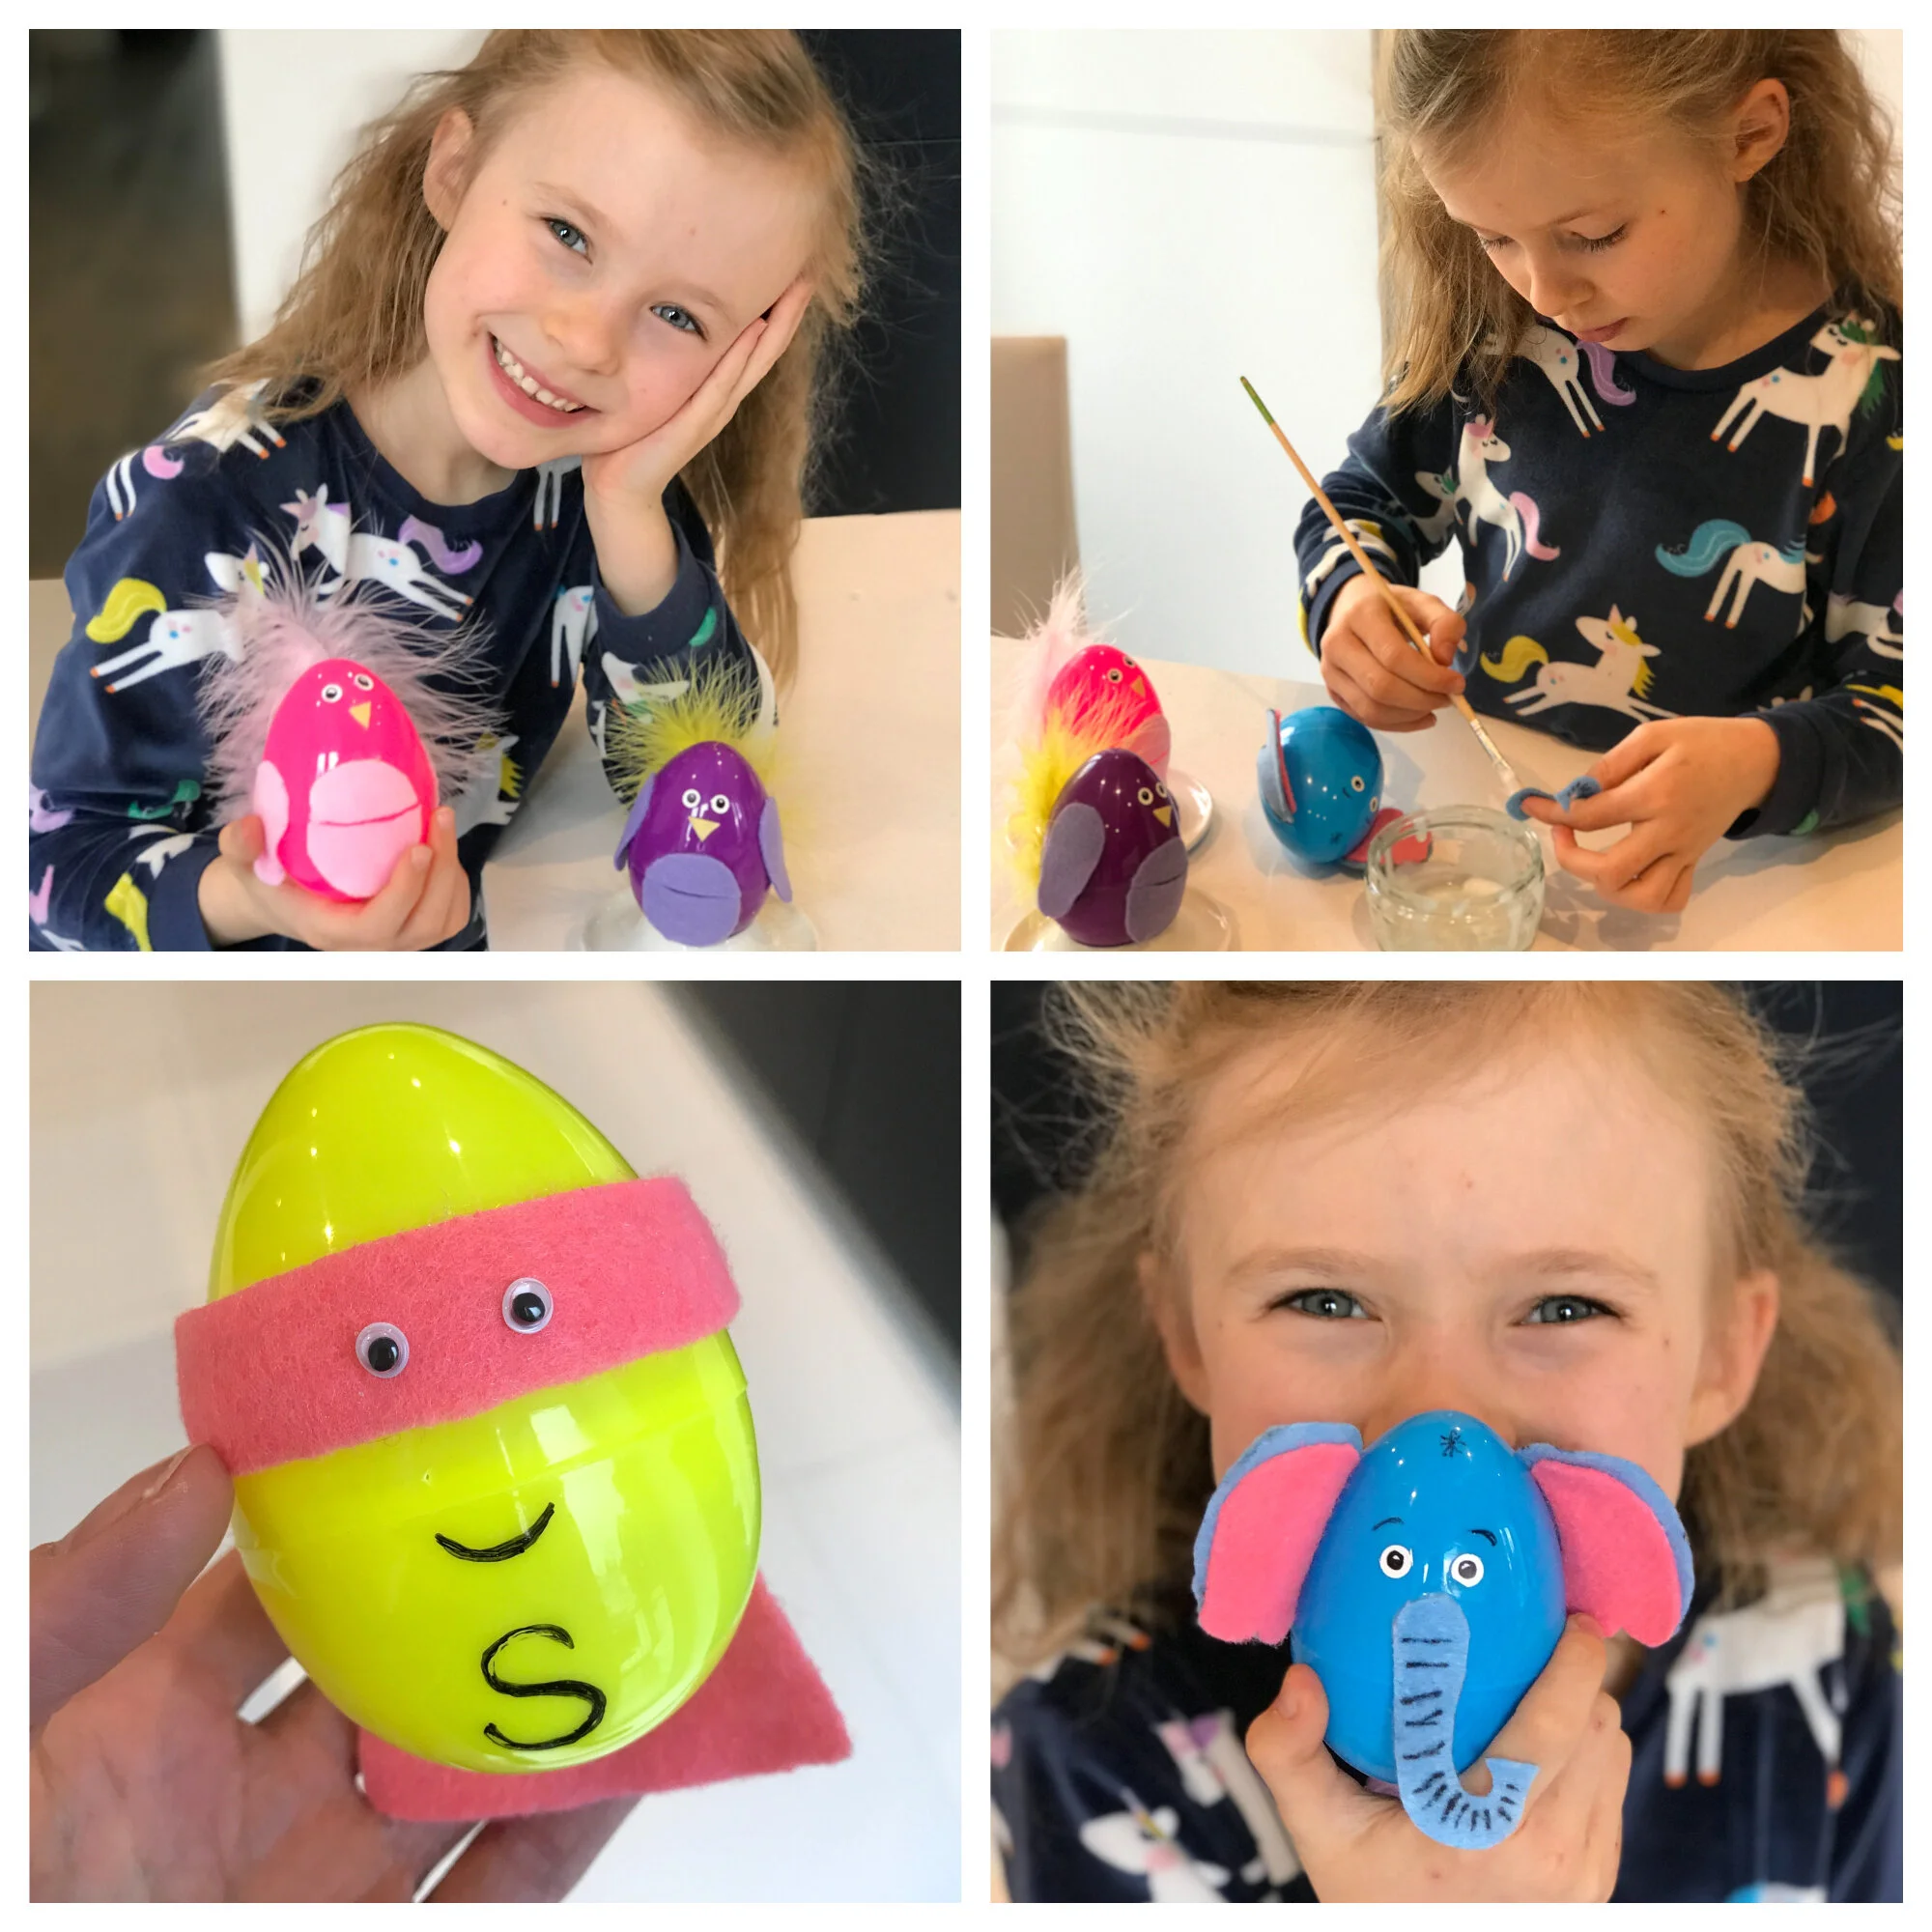
Part of our home learning this term was on the theme of superheroes, so Annabel decided that a superhero egg (reminiscent of picture book hero, Supertato) was essential! She also created an elephant as it is her friend’s favourite animal… so not quite the Easter theme I had expected!
If you’ve still got school packed lunches to make in the run up to the Easter holidays, why not fill these eggs with carrot sticks, baby tomatoes or other finger food - I presented Annabel with one filled with blueberries after school (is anyone else’s child ravenous the moment they walk out of school?!) and she loved it.
Learning made fun! (KS1)
This idea from Natural Beach Living is a brilliant way to give phonics an Easter twist, by using plastic eggs for different word families.
Simply write a word ending on the right half of an egg using permanent pen, and about 5 letters on the left half, making sure that when one half is rotated the letters from the two halves combine to form a word (have a look at the picture below to see what I mean!)
Your child will become confident reading each word ending and learn to form a range of rhyming words simply by twisting one half of the egg around.
Word families you could try:

AT: mat, pat, cat, sat, hat, bat, rat, chat
AP: cap, tap, map, clap, rap, flap, yap, gap, nap
AY: pay, hay, way, say, day, may, play
IP: lip, sip, nip, tip, hip, rip, slip, flip
ELL: bell, well, smell, tel, shell, sell, yell, fell, spell
Once your child has got the hang of this, try helping them to create simple sentences using multiple words from a single egg - the sillier the better!
‘The hen had ten pens’
‘The dog ran through the fog into a squelchy bog’
‘The cop popped a floppy mop on top of his head!’
Stripy Shapes (KS1 upwards)
This is such a simple, but incredibly effective way to make beautiful cards. (You could of course adapt it to suit any season by using a different shape on the front and a different colour palette)

Annabel rocking her disco unicorn costume whilst crafting!
Draw and then cut out a simple shape such a bunny or Easter egg on the front of a card ( - I printed off an outline image from google and used this as a template to make life easier and so that we could use the identical design on multiple cards)
Cut out a piece of paper or card very slightly smaller than your finished card.
Cut strips of coloured paper (I used some decorative scrapbook paper that I had in the craft cupboard - you can find something similar at Hobbycraft, but you could paint different patterns or colours onto pieces of paper and then cut them up) and stick them horizontally next to one another on the paper to make stripes.
Trim off any pieces that are sticking out beyond the piece of paper.
Once the page is full, stick it to the reverse of your cut out shape so that the colours show through.
Finger painting (Preschool upwards)
Not just for toddlers, Annabel still enjoys a spot of finger painting and created a beautiful Valentine’s Day card using the technique. Why not give this colourful bunny a go.
Use tiny pieces of blue tac to hold a paper template of a bunny (or Easter egg or whatever shape you like!) to the front of your card - we used the template from the Cut Out Cards above.
If you have ink pads, then use these, but if not, put small amounts of paint onto a plate (as we did here).
We had fun making this hen and her little chicks - Annabel came up with the idea of a chick still stuck in its egg and it is certainly a cheeky little addition. Her fingers are getting long and slim now, so if you’re doing this with smaller children, their handprint hen will look a little more in proportion!

Top Tips:
Make sure that you have the baby wipes or a damp flannel to hand before embarking on any sort of painting activity with little ones to avoid colourful fingerprints making their way elsewhere the moment you leave the room!
Hide and Seek Bunny (KS1 with support or KS2)
Annabel loved making these bunnies: they have really captured her imagination as she has been playing with them ever since, making up lovely stories.

Pierce a hole in the bottom of a paper cup (I had some Easter ones left over from last year, but any design will do).
Pierce another hole in the side of the cup about 5cm down from the top. Pierce a second hole directly opposite.
Tape three bendy straws together just above the bend. (These straws are great as they are biodegradable)
Trim the two outside straws so that there is about 8 cm from the bottom of the bend to the end.
Poke the long straw through the hole at the bottom of the cup - this will become the handle - and the shorter straws through the holes in the sides of the cup.
Cut out bunny paws or circles from card and stick on the end of the two shorter straws. (Our paws were about 3cm long).
Cut out a bunny face - this can be as simple as a circle with ears and stick over the taped section to hide the tops of the three straws. (Our head was about 6cm in diameter and the ears were an extra 6cm long).
When you push the handle up and down the bunny will disappear inside the cup and raise her hands, and then pop out again - peekaboo!
Top Tip
When piercing holes, place a piece of blue tac, play dough or even a rubber on the table and place your cup over the top. You can then gently press down using a pencil or scissor blade.
Nature activities

Carrot Tops (Preschool +)
You can’t grow new carrots this way, but your little ones will be amazed to see the tops sprouting. Slice the tops off carrots, (parsnips, beetroot or celery also work) and keep in a shallow dish of water. They will sprout within a few days.
If you really do want to grow your own carrots, plant up your sprouting tops; once they flower you’ll be able to collect the seeds. Check out the RHS website for info.

Cress egg heads (Preschool +)
Cress is easy and so quick to grow that it satisfies even the most impatient of children.
Simply wet some tissue or cotton wool (though be careful not to waterlog the surface) and sprinkle some seeds on top. The seeds will germinate quite quickly - sometimes within 24 hours! After 5-7 days, the shoots will be long enough to snip off and munch in salads or sandwiches: they have quite a peppery taste, so may not be to your children’s taste, but they will certainly enjoy snipping off the shoots and might even help to prepare lunch for the adults in your household.
Top Tips:
Cover the top of the egg with a piece of cling film until the seeds germinate as this will help to reduce evaporation and create a mini greenhouse, encouraging the seeds to grow.
Let your child decorate the egg first by drawing on a funny face, so that the growing cress becomes their hair… later, they can give their character a hair cut!

A helmet is apparently essential when planting GIANT sunflowers!
Sunflowers (Preschool +)
From mid April, you can plant sunflowers ready to watch through the summer. Choose a giant variety such as American Giant for the most fun! The RHS has advice on how to plant your seeds, but my top tip is to soak the seeds in a glass of water for 24 hours before planting. This gives them a kick start!
We grew sunflowers last summer and harvested the seeds, so it’ll be interesting to see whether they grow… (I’m not known for my horticultural prowess, but it’s worth a try!)
A Kindness Tree (KS1 +)
Budding twigs make lovely displays at this time of year. You can collect some from your garden, buy fake twigs or you may have some sparkly or painted ones left over from Christmas time. Last year, we decided to make our twigs into a kindness tree. In addition to hanging eggs, I placed some eggs cut out of thin card and a pencil next to the tree. Anyone could write an encouraging message for another family member - it could be as simple as ‘Smile’ - or something that they were grateful for that day - ‘Mummy’s apple crumble was delicious’ - and add it to the tree. It certainly made me smile to see what had been added.

Easter Garden (Preschool upwards)
There is more to Easter than just chocolate, and an Easter garden can be a great way of introducing the Easter story to children. Or you can leave out the religious elements if that’s not your thing, and just enjoy a little horticulture!
My little girl loved making her Easter garden. We used the bowl from a My Fairy Garden kit that she had received the year before as a birthday gift, but you could use a tray, plant pot or directly in a section of flowerbed.
We don’t have a very extensive garden, so we went on a nature walk and collected flowering weeds, bits of fallen bark and even pieces of pottery that we found in the mud. It’s a great opportunity to look for minibeasts too!
We built a little cave with an upturned cream cheese pot and covered it with the bark, stones and pottery pieces that we had found. We added an egg shell of cress seeds so that we could watch them growing. Amazingly (given that I can even kill cacti) the weeds we had collected thrived, grew and flowered too!

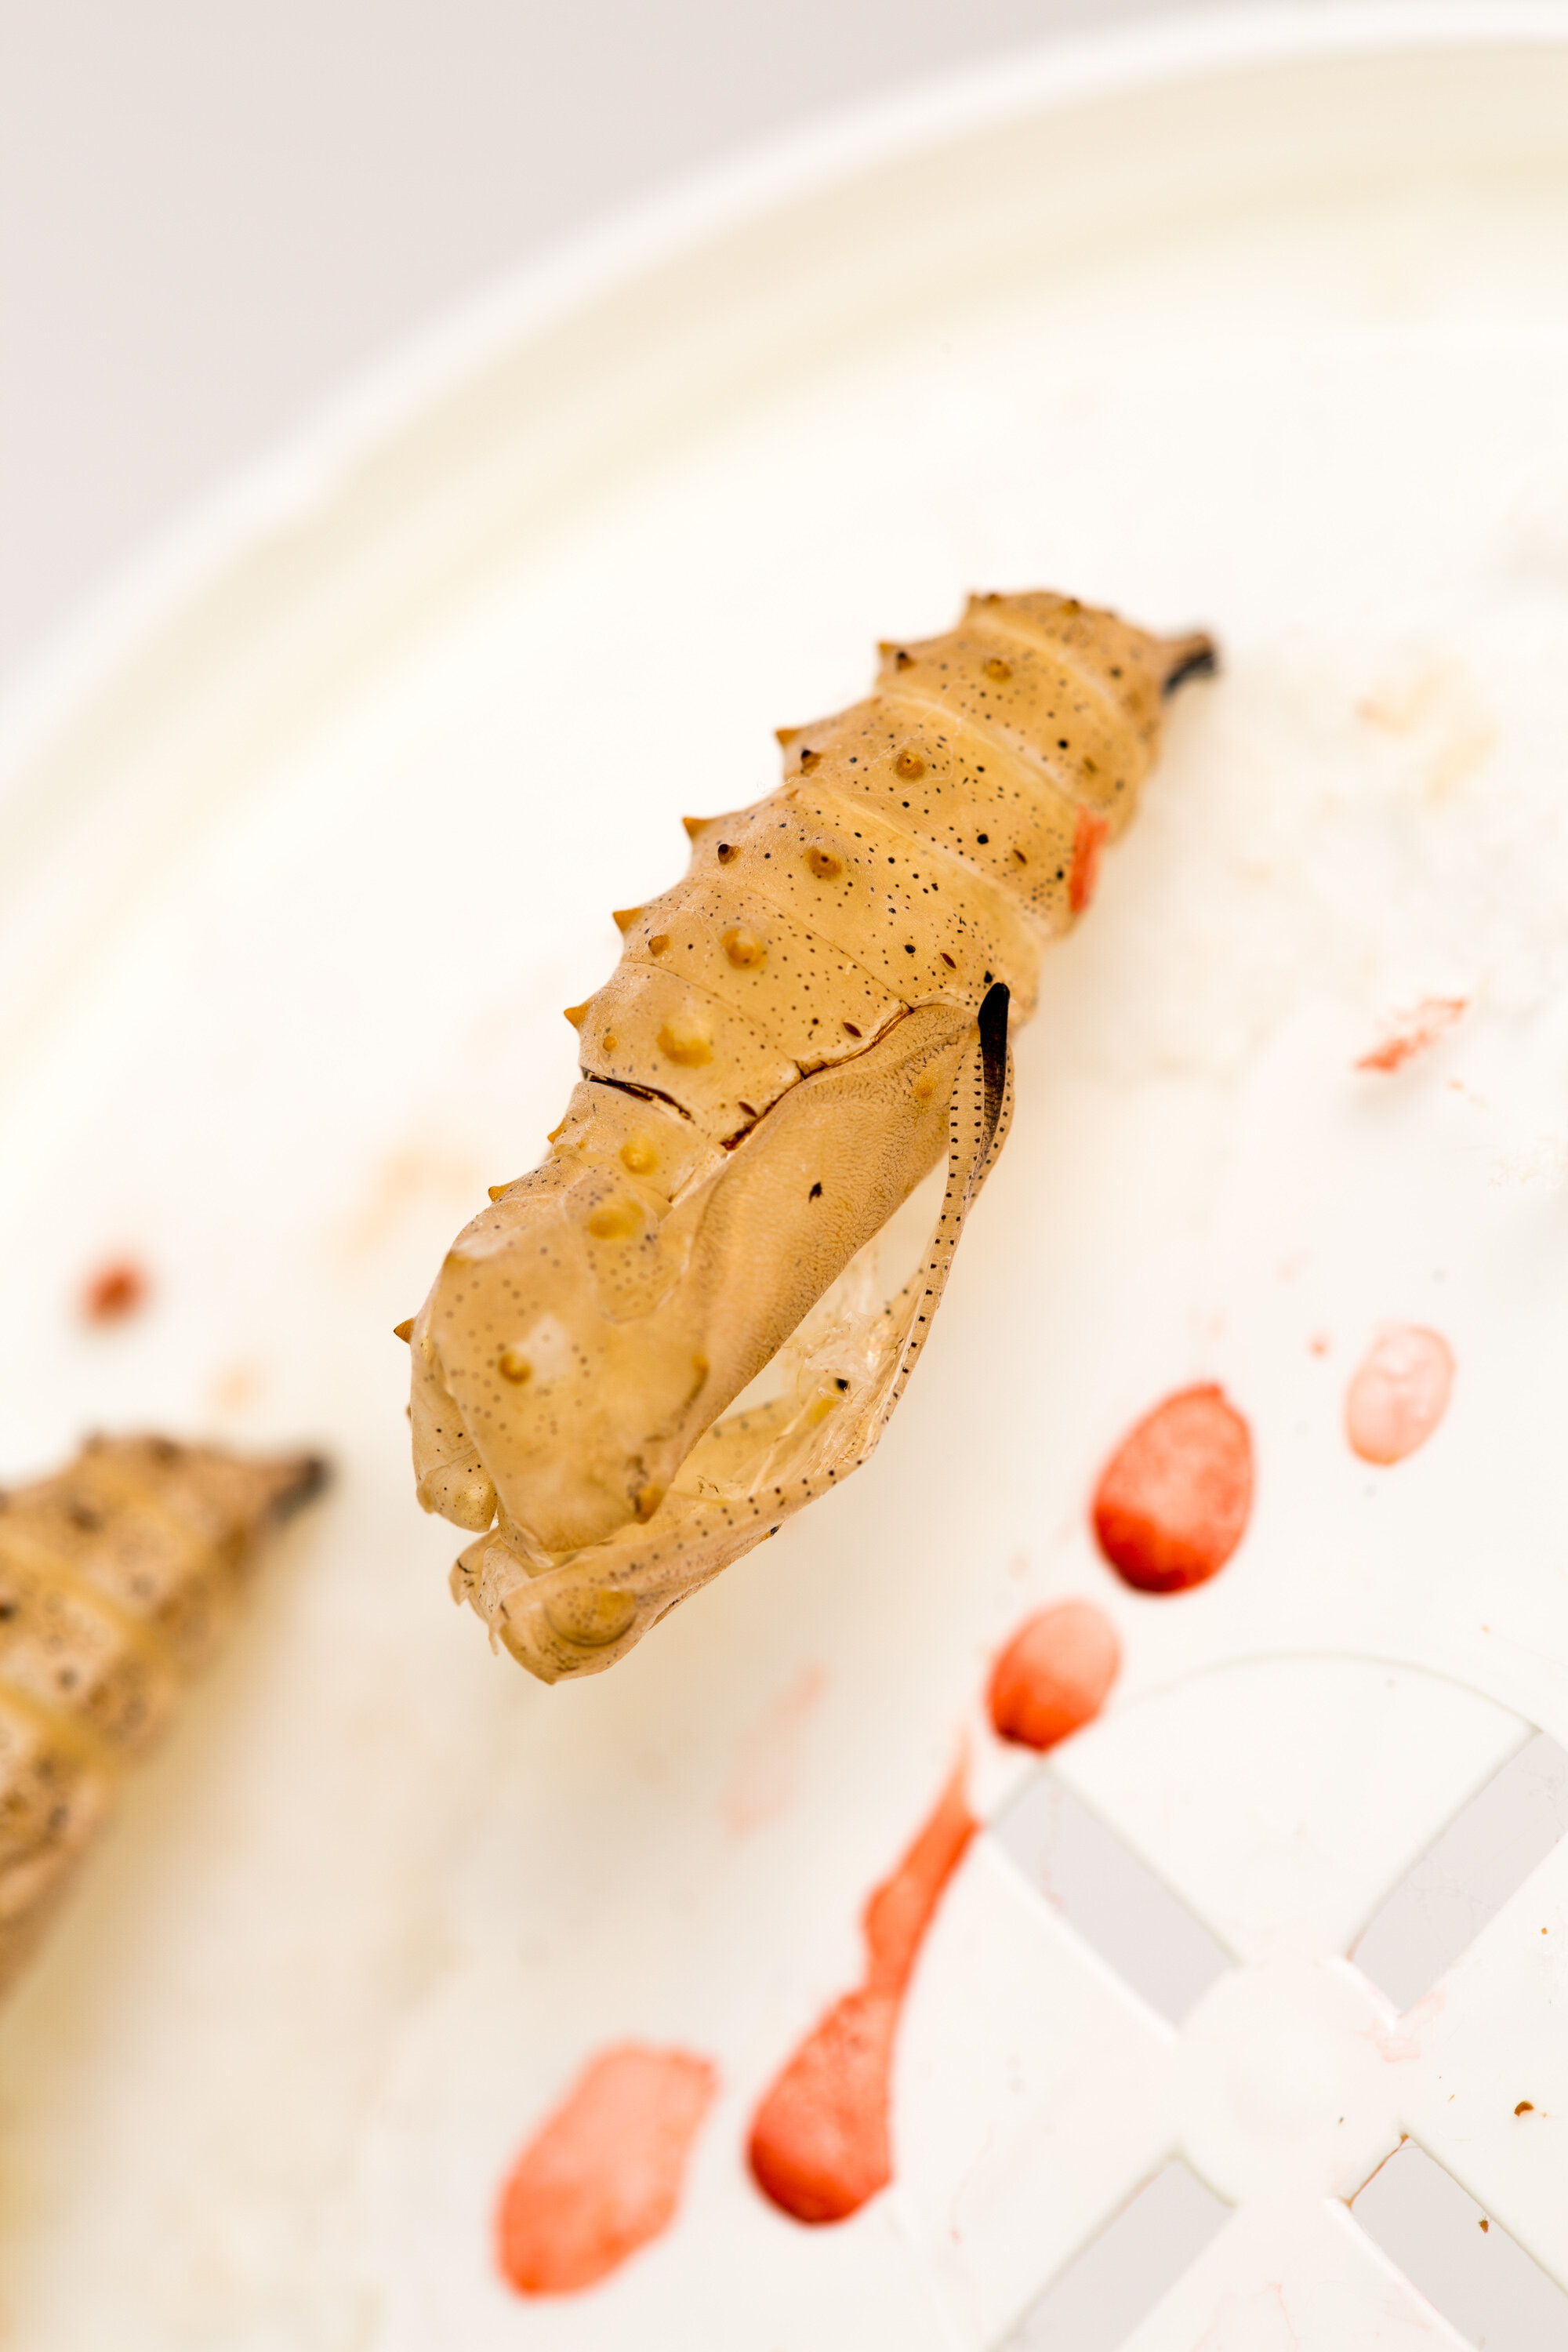
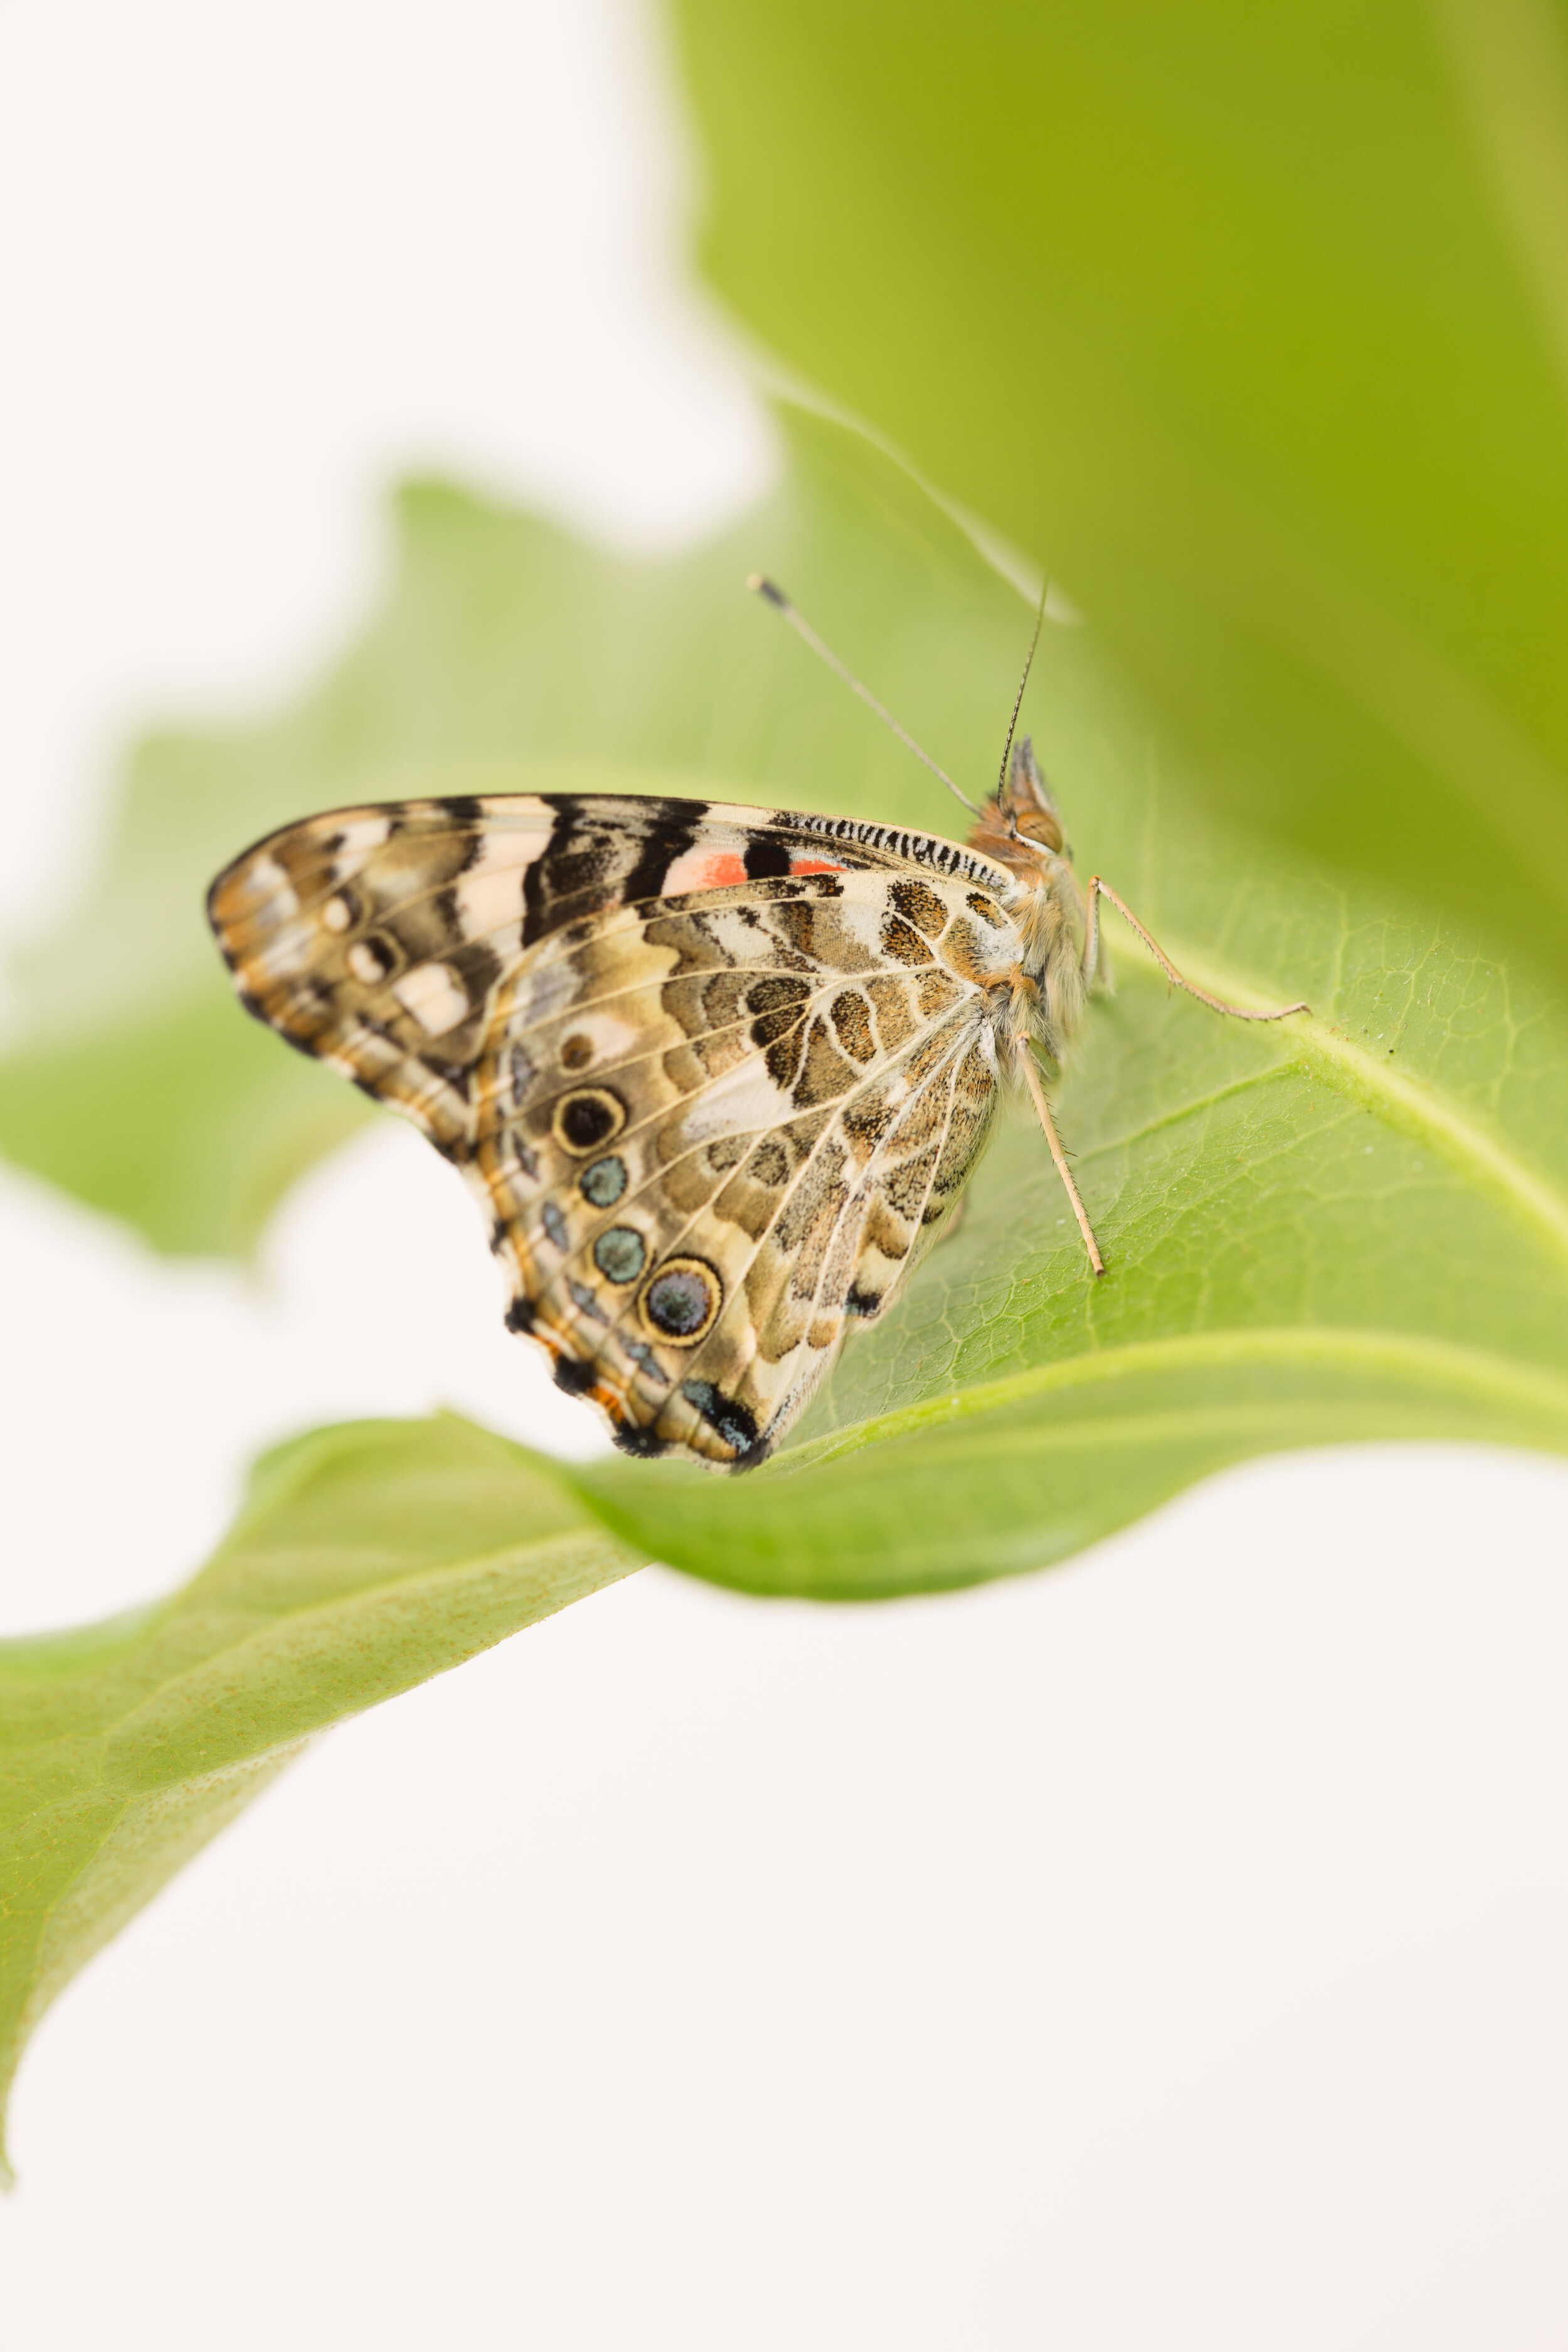
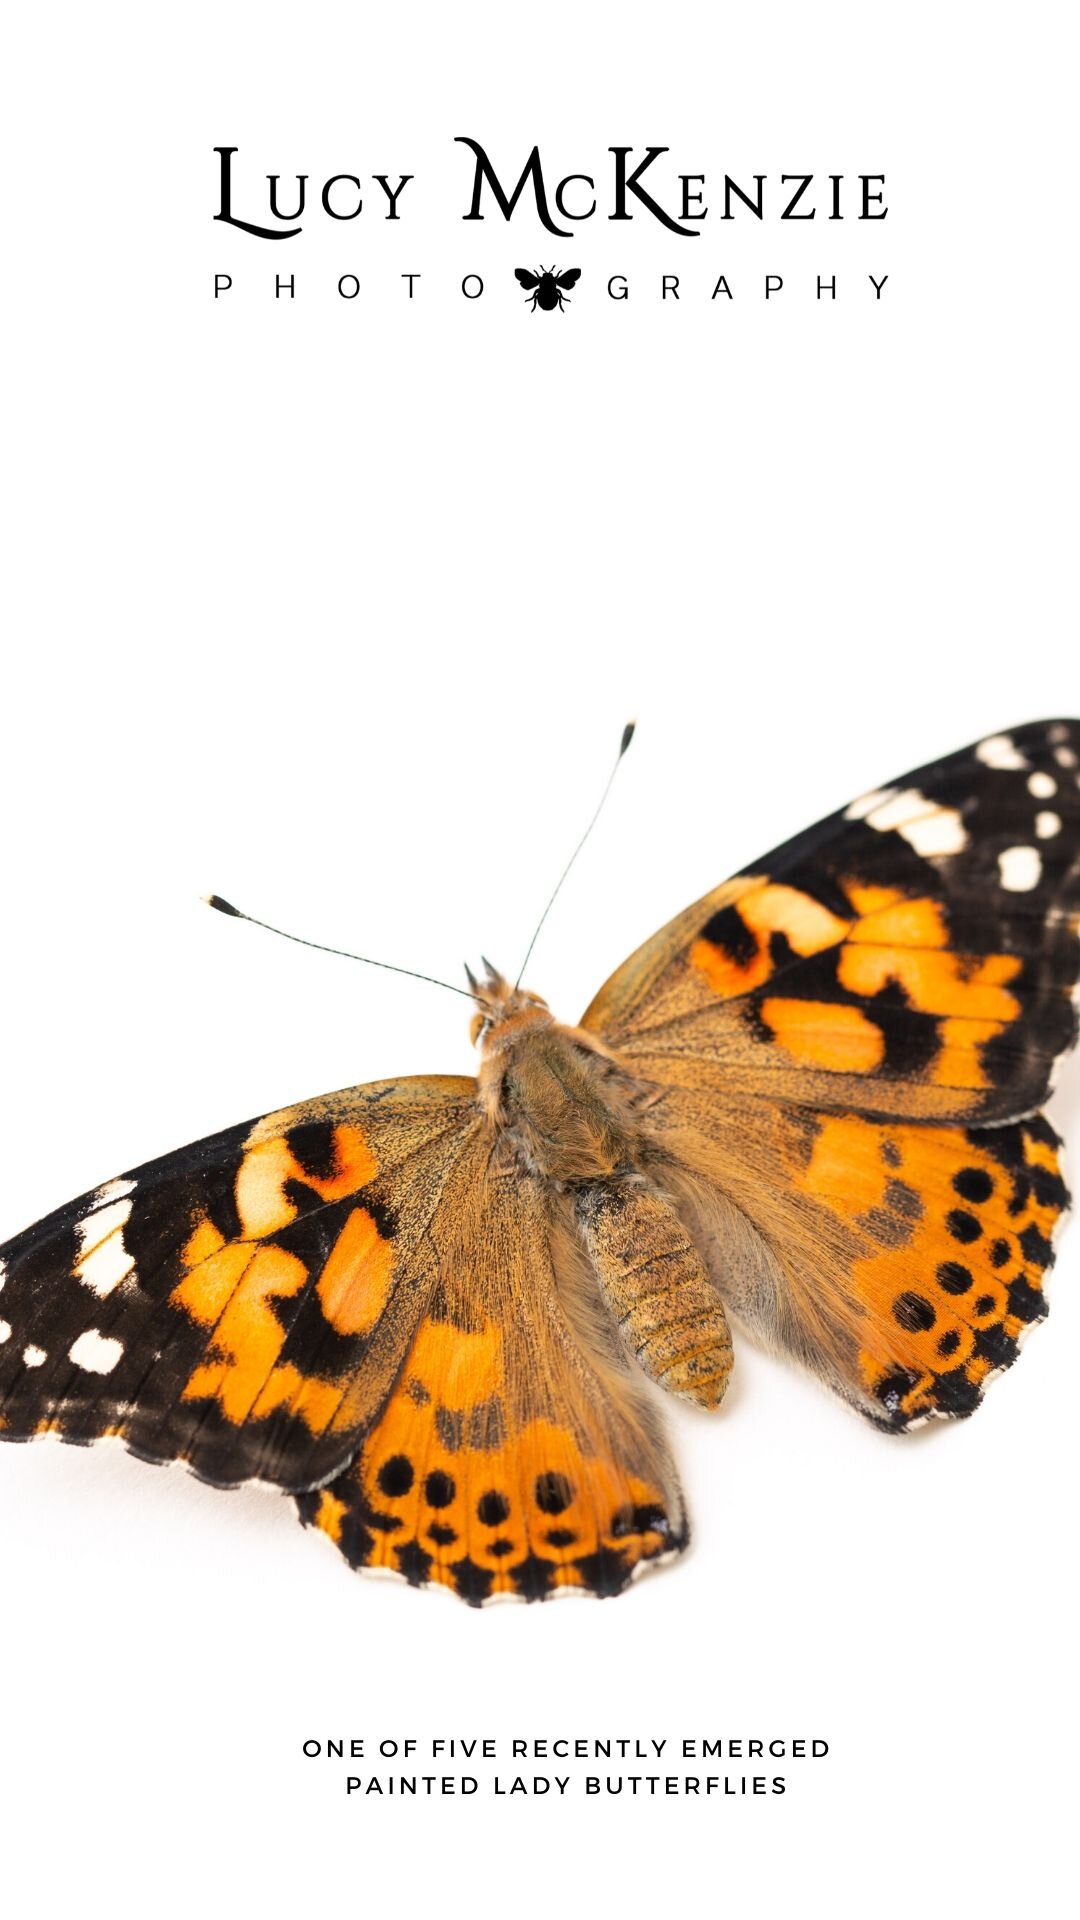
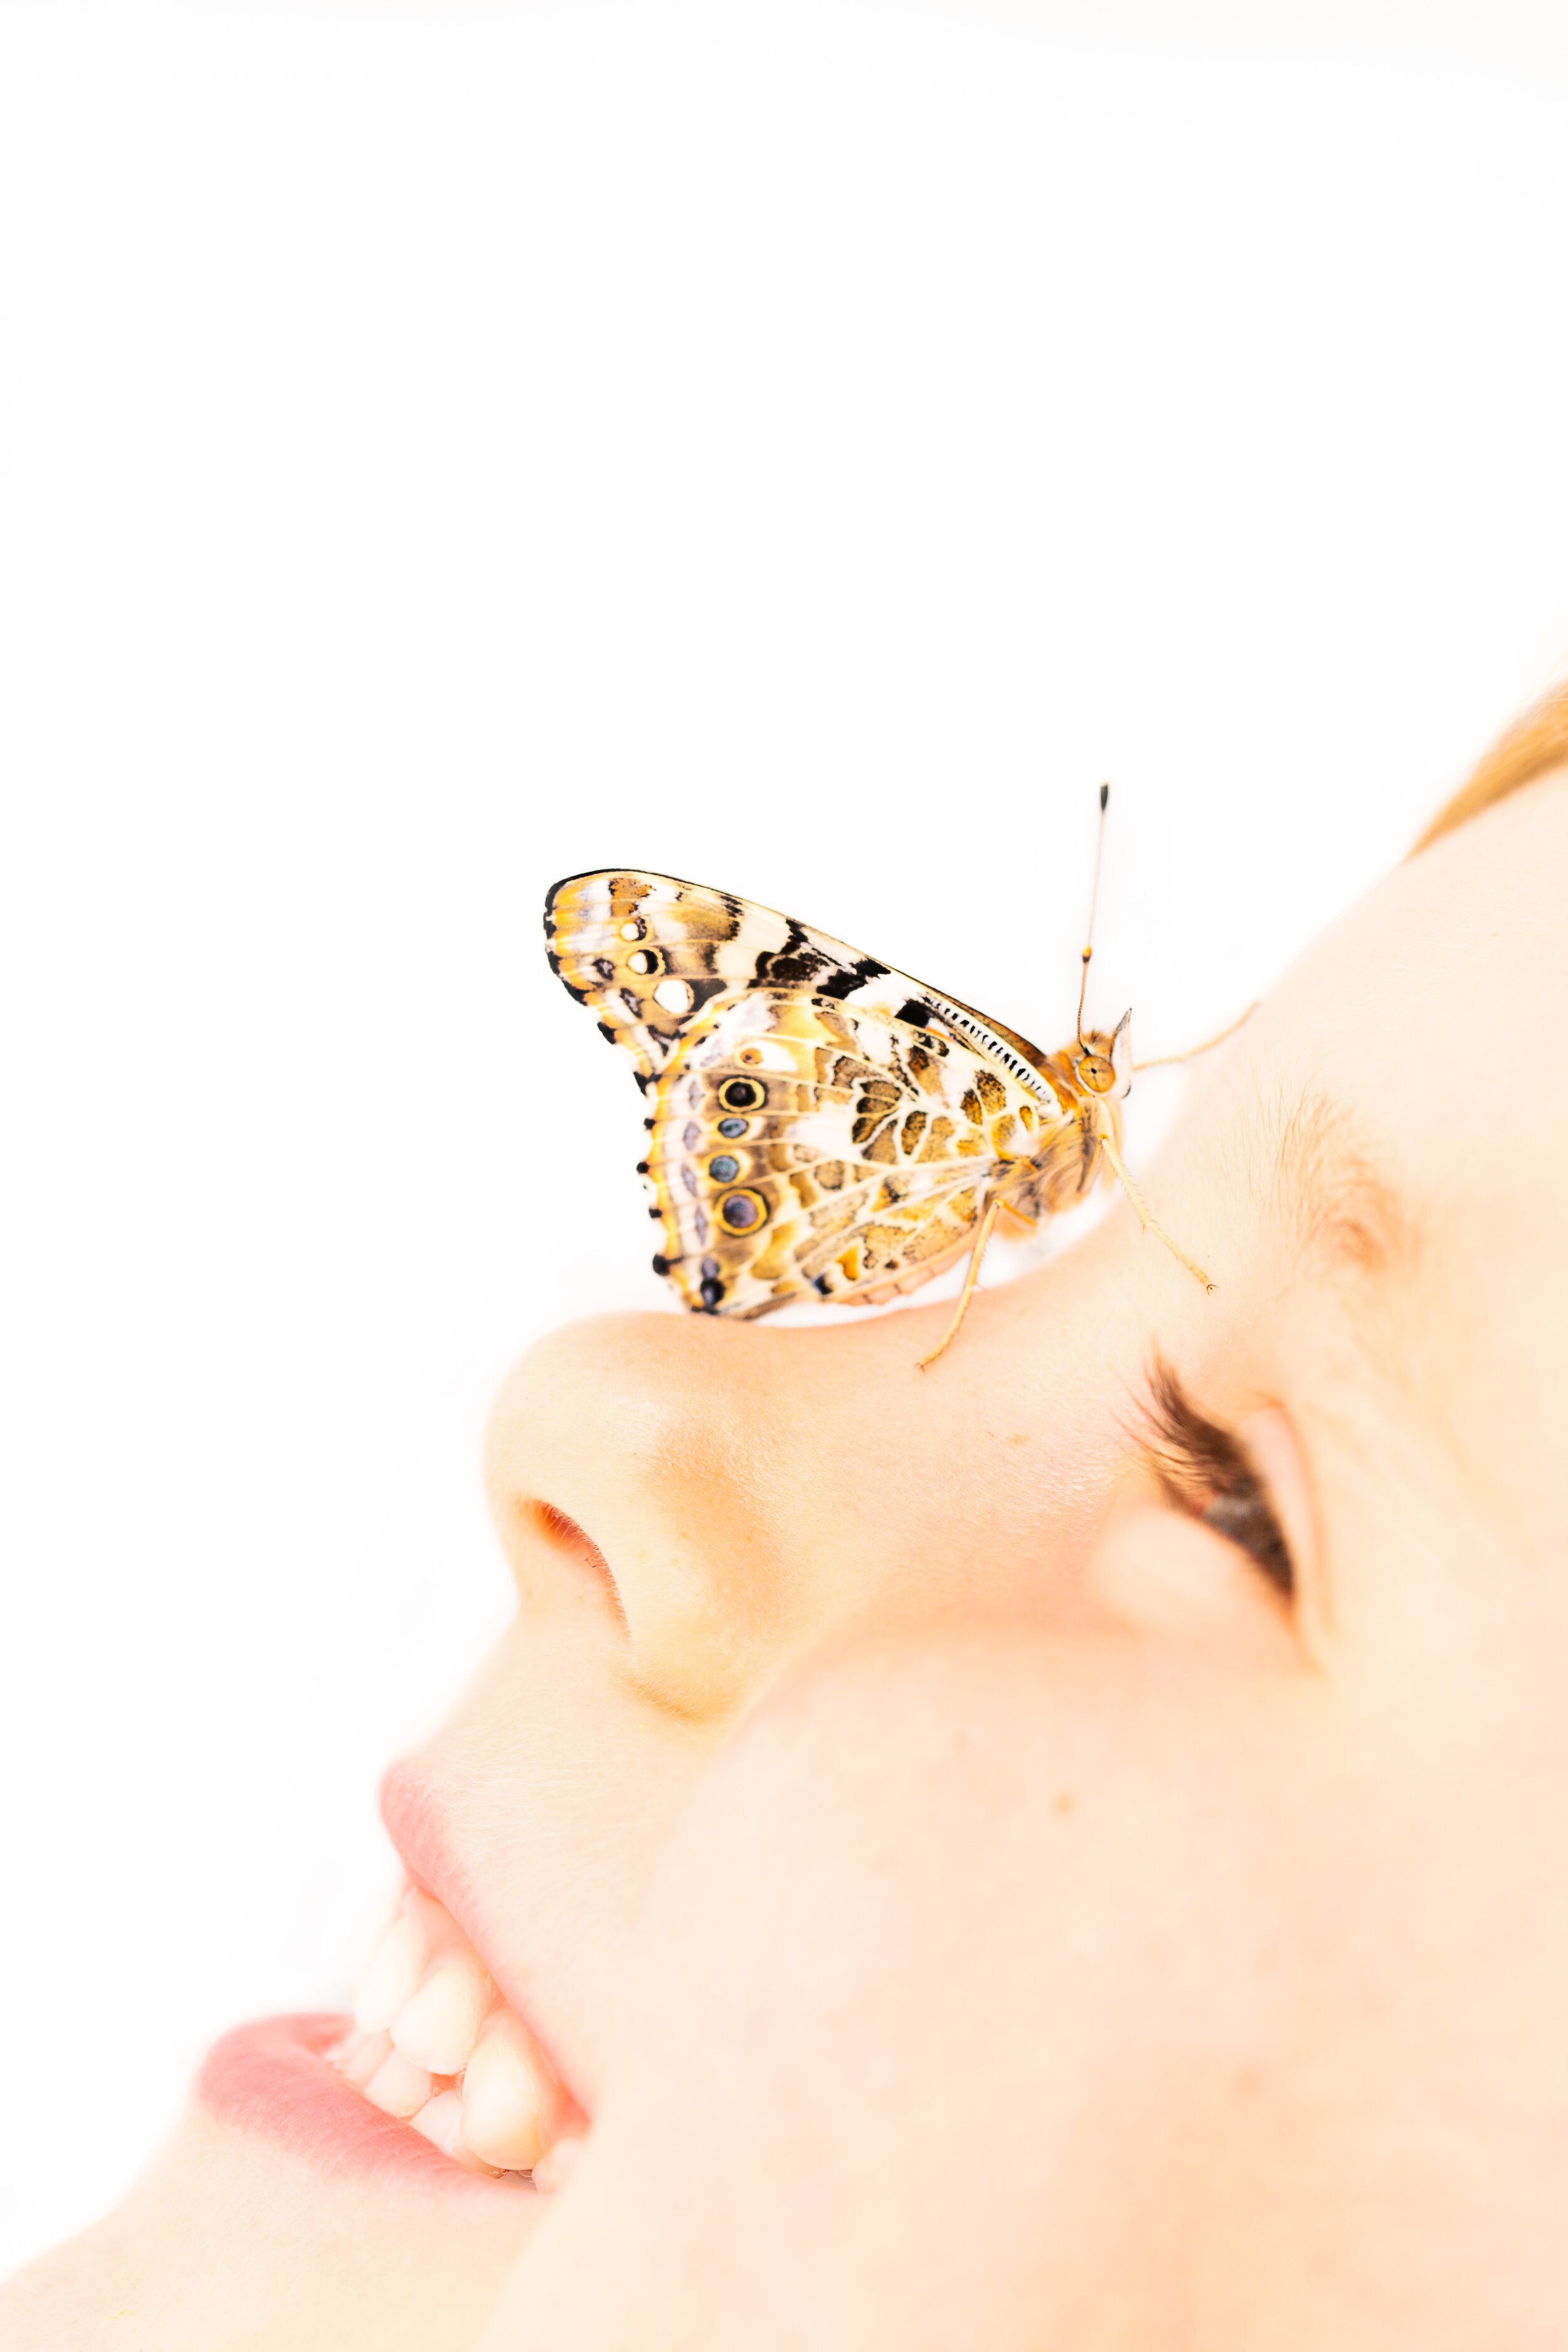
Caterpillars to butterflies (Preschool upwards)
Last summer, I bought a butterfly garden and we watched the metamorphosis from egg through to butterfly with amazement - it was an incredible process and I was as stunned as Annabel!
Have a look at this video of a caterpillar forming its crysallis - what happens is almost unfathomable! I’ve ordered a caterpillar refill pot for last year’s kit, so we will be able to enjoy the whole process again over the Easter holidays.
Other activities….
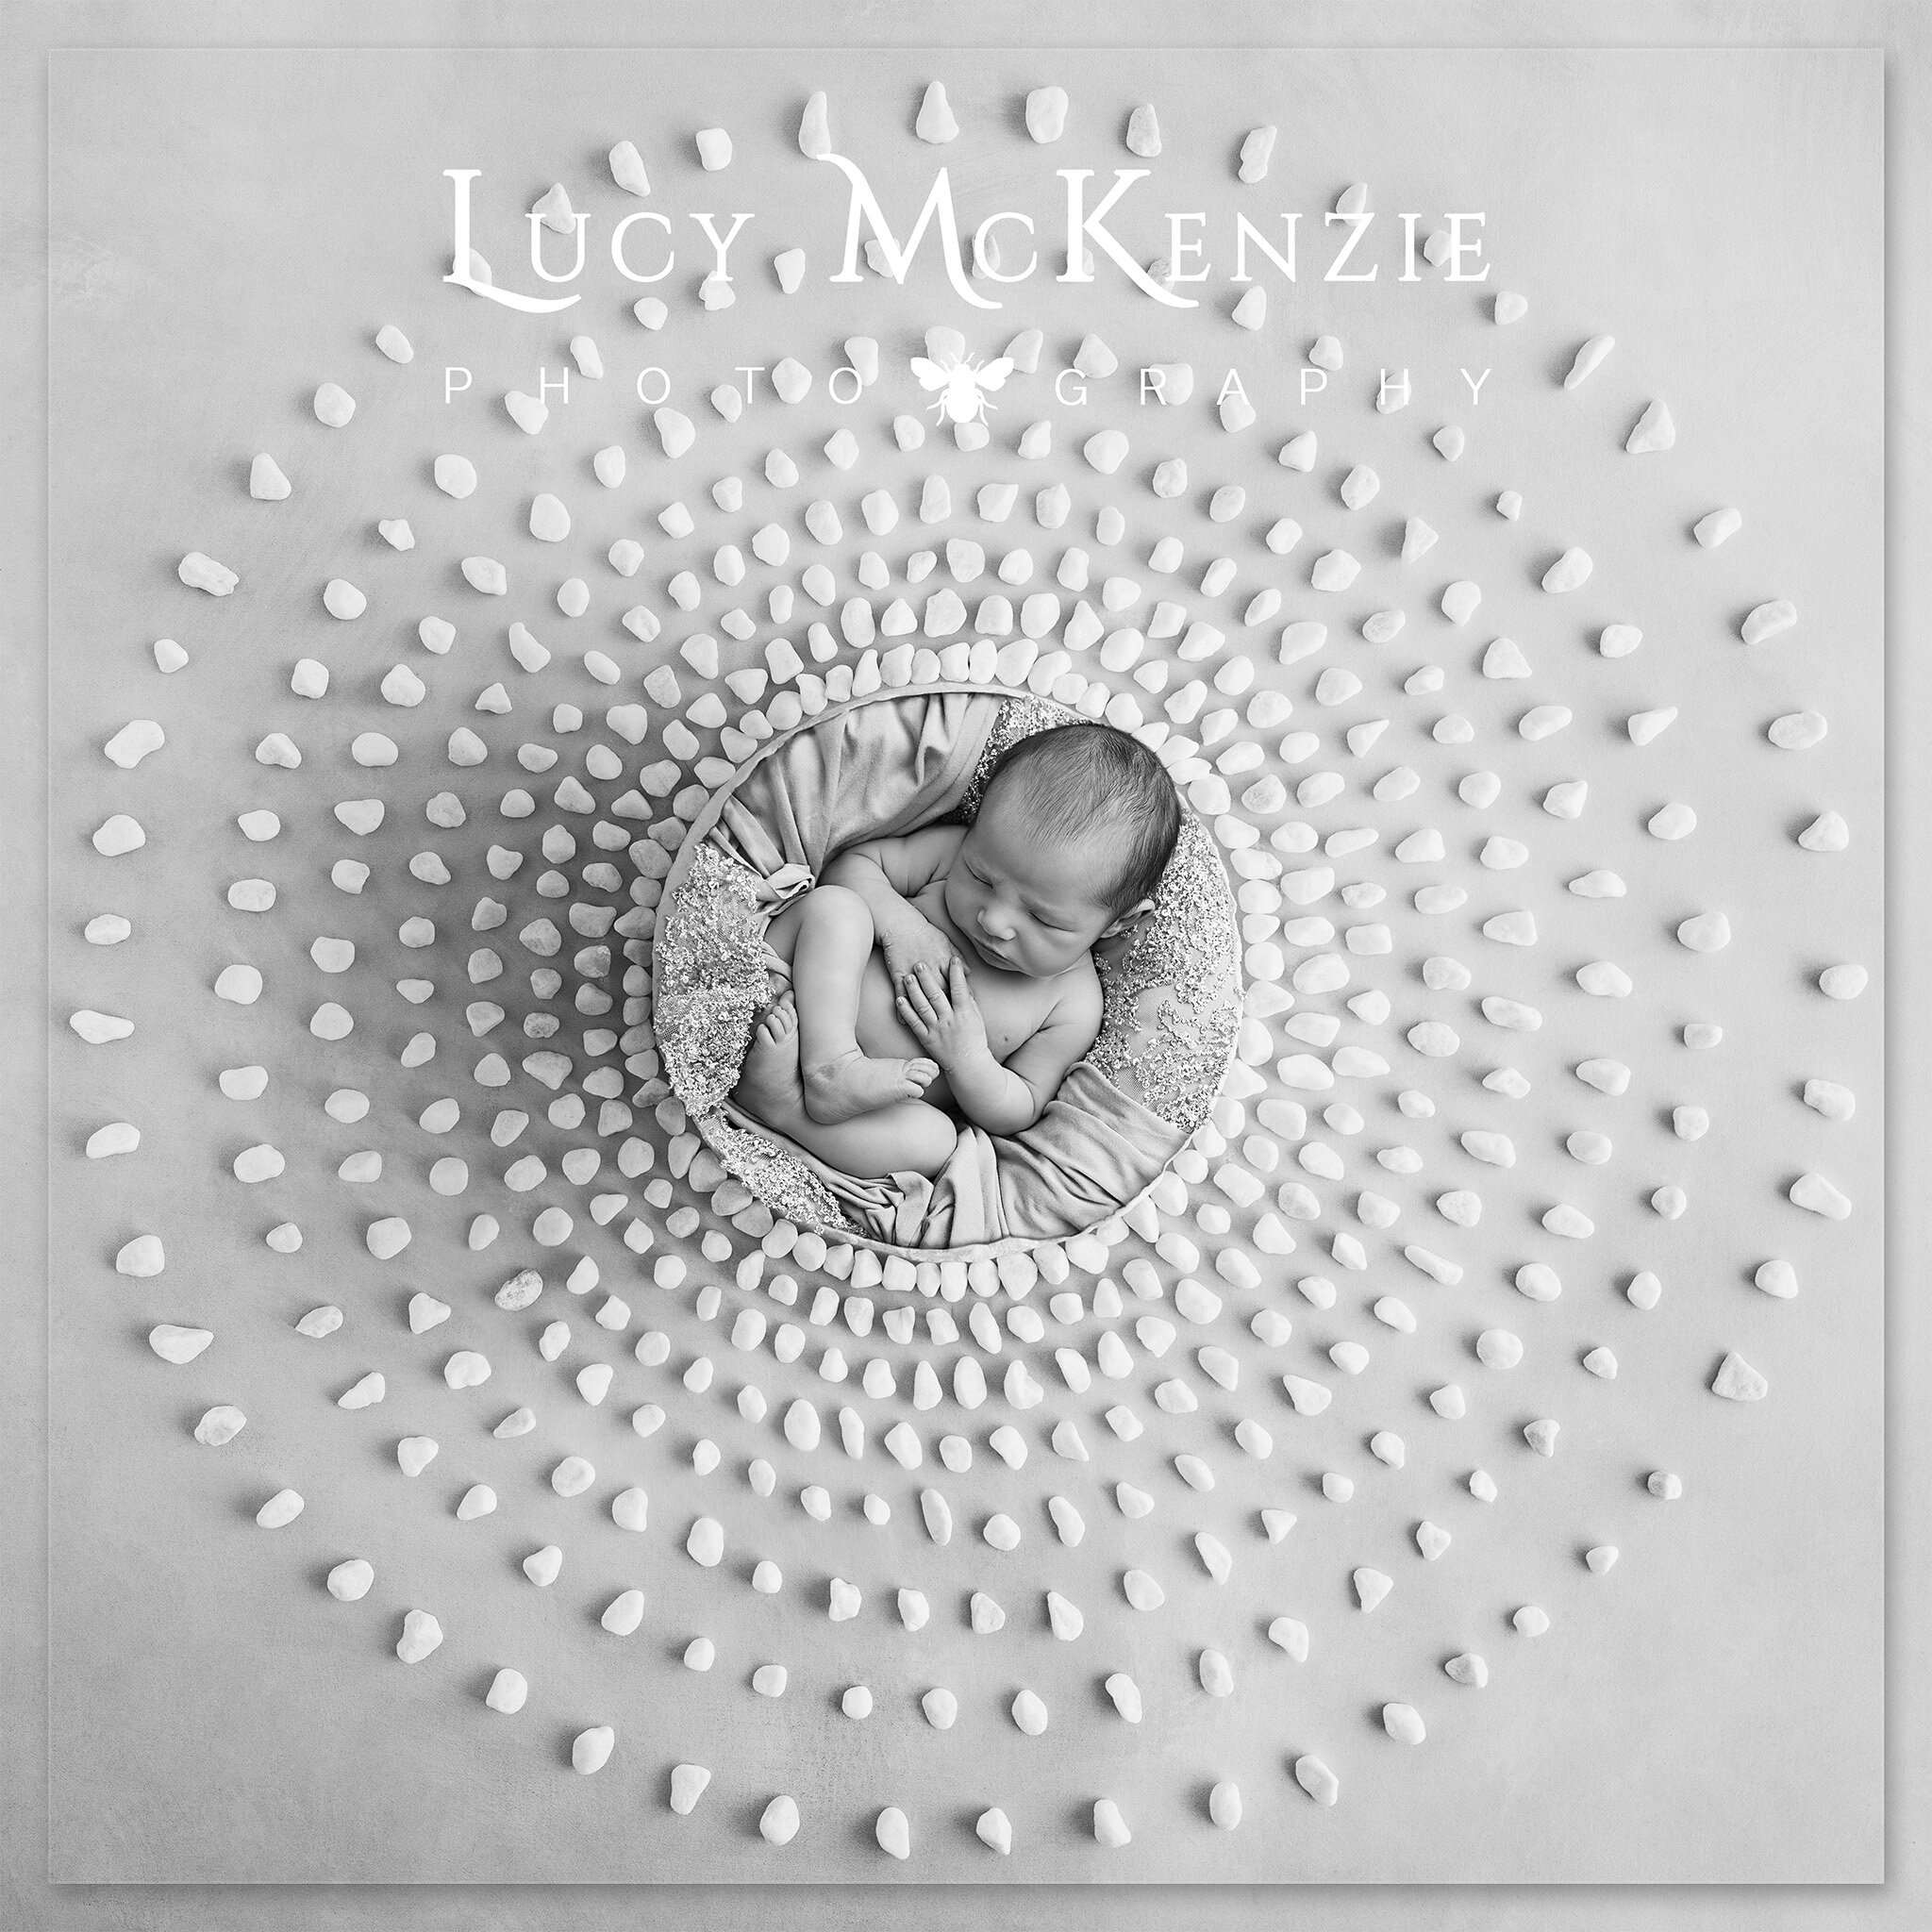
Photos
Whether you are expecting a baby, are just about to welcome your newborn, are celebrating a first birthday or your own big birthday, or simply haven’t had an opportunity to update your family photographs in a while, then do get in touch as I would love to capture these memories for you to enjoy for years to come.


Fundraising for Ukraine

A few weeks ago, I posted about Annabel’s fundraising efforts for the Ukraine: she has been making ribbon pins in the colours of the Ukraine flag before selling them to neighbours. So far she’s made about 150 pins and raised over £540!
If you would like to do the same, there are instructions on how to make the pins on the blog. Do send in a photo if you give them a try - Annabel is so excited that other children have ben inspired to make their own.
If you live in or near Tunbridge Wells, you can buy one of Annabel’s pins at The Kitchen Table - a really lovely community cafe on Camden Road. There is space for buggies and the staff are incredibly welcoming - well worth a visit!

Enjoying a HUGE Belgium bun at The Kitchen Table
If you’ve made it to the end of this list, then hopefully you’ve got lots of ideas to go and try… let me know which ones you enjoyed and if there is anything you will definitely be giving a go over the next few week or so - I’d love to see your photos!
Happy Easter!
Love Lucy and Annabel x